HELLOPANDA MANUAL
Change website font
This manual will no longer be in use starting from July 1, 2024.
Please note that after the addition of the custom management feature, resizing the website will now be replaced by the manual below.
THIS GUIDE EXPLAINS
THE GOOGLE FONTS CDN METHOD,
NOT UPLOADING.

It is advantageous to use commonly used CDN fonts as the website font. In certain situations, you may want to use a special font, but most people use Google fonts.
The reason why Google Fonts are advantageous is because the download speed is dramatically faster due to caching in the case of widely used Google phones. The more popular fonts you use, the faster the loading speed will be.
This guide requires some modifications to your PHP files. It is not difficult or complicated to modify, but since PHP files are server-side files, if an error occurs if modified incorrectly, it can lead to fatal results for the service.
It is always a good idea to get into the habit of making a backup when modifying code.
01
Find the font you want in Google Fonts
hellopanda WP manual
1.
Visit the Google Fonts site.
2.
Once you find the font you want, click the “GET FONT” button.

3.
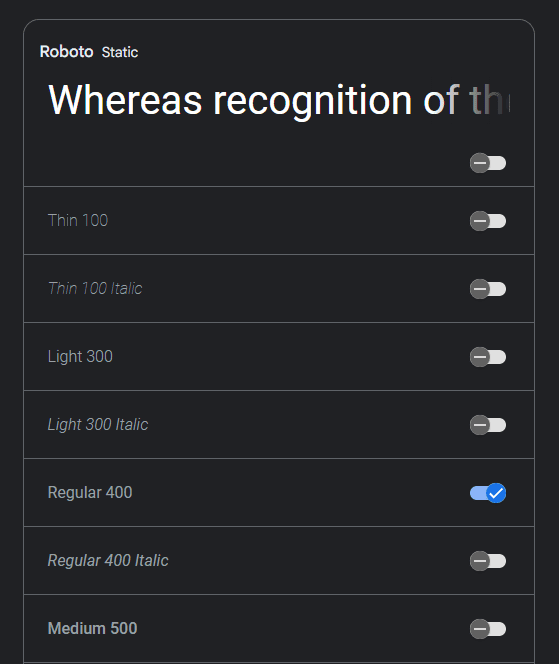
Please select no more than two fonts if possible and include the fonts you want.

4.
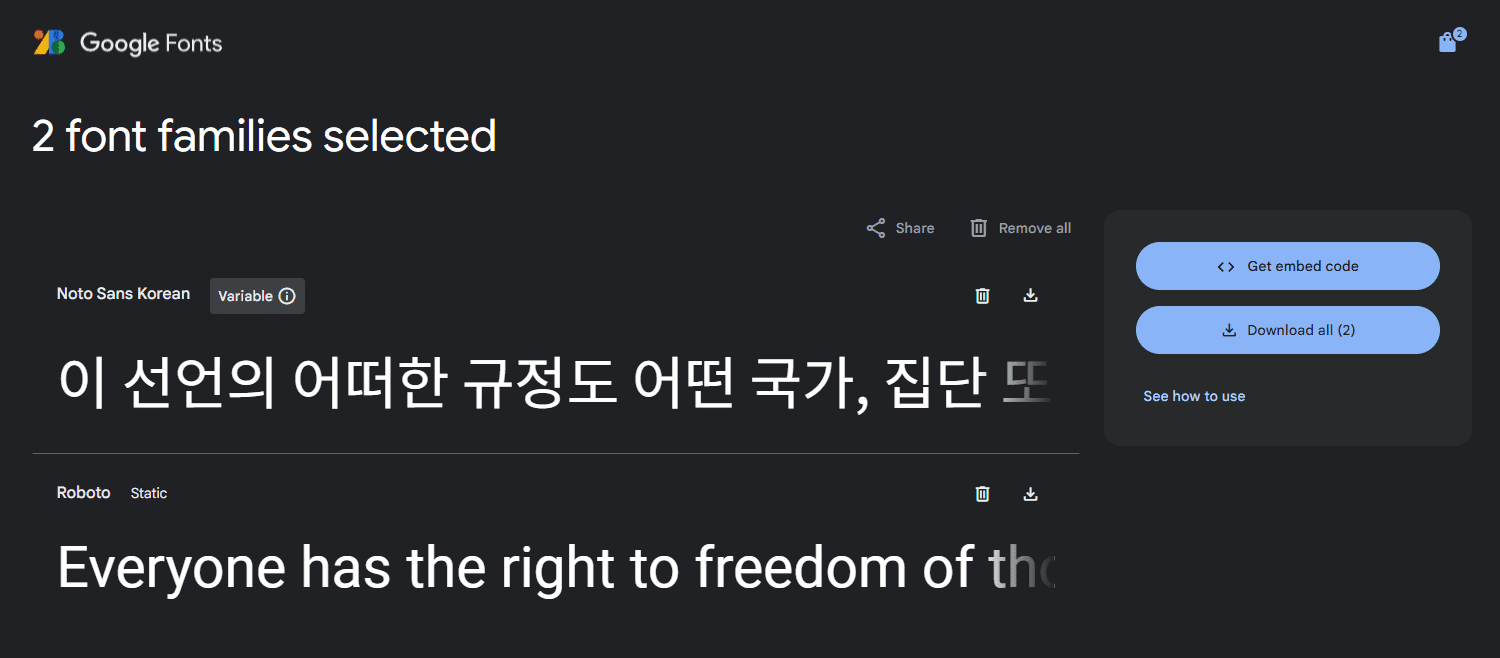
Select up to two fonts if possible, and once you have included the fonts you want, click the “ <> Get embed code ” button.
As I mentioned, this guide does not explain how to install using the “Download All” function.

5.
Among the fonts shown on the left side of the screen, check only the font you want to use.

6.
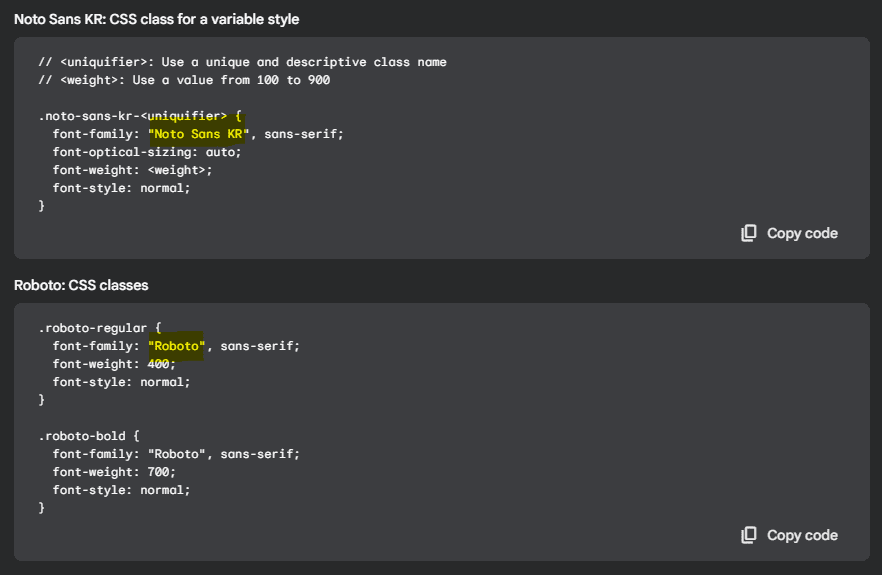
In the Web tab, copy only the source part below.
Font CDN address

Font family name

7.
You are now ready to edit your code. If the code below is ready,
let’s move on to part 02.
FONT FAMILY NAME
02
Apply font address
hellopanda WP manual
/wp-content/themes/hellopanda-theme/inc/
Hellopanda_Common.php
public $font_style_url = 'https://fonts.googleapis.com/css2?family=Noto+Sans+KR:wght@100;400;700&family=Roboto:wght@100;400;700&display=swap';- Paste the font CDN address obtained in part 01 into this part of the code.
- Since this is a PHP code modification, please check the quotation marks carefully before entering the code.
03
Setting up a font family
hellopanda WP manual
/wp-content/themes/hellopanda-theme/
theme.json
// When setting up composite fonts
  "fontFamilies": [
    {
      "fontFamily": "'Roboto', 'Noto Sans KR', 'sans-serif'",
      "name": "Roboto + Noto Sans KR",
      "slug": "body"
    }
  ]

// When setting up single fonts
  "fontFamilies": [
    {
      "fontFamily": "'Roboto', 'sans-serif'",
      "name": "Roboto",
      "slug": "body"
    },
    {
      "fontFamily": "'Noto Sans KR', 'sans-serif'",
      "name": "Noto Sans KR",
      "slug": "body"
    }
]- The “ font family name ” obtained in part 01 is used in this part.
- ‘sans-serif’ It is best to always leave this font. This is the default font that will be displayed when web fonts are not downloaded.
- The “name” item does not have any effect on the actual font, but it is a name that can be distinguished when selecting a font in the editor, so it is best to write it down as much as possible.
- Font information is defined as an array. Therefore, you can set them separately as composite fonts and single fonts.
- In most cases, you can set it to a composite font type. In some cases, if you want to use a specific font, it is better to use a single font.

